|

PSR-500
PSR-600

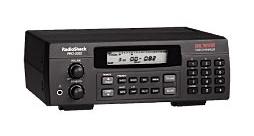
PRO-106
PRO-197
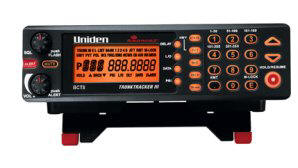
BCD996T
BCT15
BCD396T
BC246T
BR330T
BC95XLT
SC230
BC898T
BC296D
BCT8
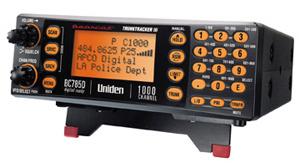
BC785D

BC796D

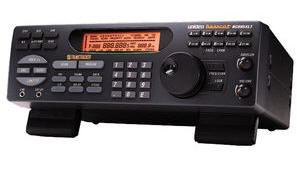
BC780XLT
PRO-2052
BC895XLT

| |
Implementing Intelligent Audio Capture (IAC)
- Audio From Your Scanner – The Uniden scanners
that ScanControl supports have different methods of transferring the
received audio to the PC. The table below shows each model ScanControl
supports and the recommended way to connect the scanner to your PC’s sound
card. Please note the cautions and warning statements in the chart as an
incorrect connection can damage your radio, sound card or both. In all
cases you will need an audio “patch” cable, stereo or mono depending on your
radio, to connect your radio’s audio output to your PC’s sound card input.
Our testing shows a stereo cable works with all radios even though some only
output one channel. Pay particular attention to the Audio Volume from
Radio column in the table below. On some radios the audio level
(volume) has to be controlled using the volume control on the radio, in
others the audio volume is output at a constant level regardless of where
the volume control on the radio is set.
- Configuring the PC Sound Card – The PC’s Sound
Card is the means by which the radio’s audio is transferred into the PC for
recording. Every PC sound card is different but almost all have multiple
inputs and outputs. Your PC should have a sound card control utility
similar to the one displayed below. There are two or three controls you
need to adjust in order to have the audio coming from the scanner set to the
proper volume level and input. Master Volume – The sound card should
have a Master Volume control that should be set to the appropriate level.
Recording Source (some cards) – The recording source control tells
the sound card which input is being used as the source for the recorded
audio coming into the PC. Input Control – The input control enables
and disables the various inputs on the sound card and sets a volume level,
subject to the Master Volume level, for the input. So, if your radio’s
output is connected to the Line-In input of your sound card then you would
do the following: Open the sound card control utility from your PC’s
control panel. Enable (un-mute) the Line-In input of the sound card and set
its volume level. Set the Recording Source to be the Line-In input. Set
the Master Volume to be the appropriate level. If all these connections and
settings are made correctly then you should be able to hear the radio’s
audio coming from the PC speakers or through connected headphones if your channels have been programmed to
enable Record Out. The general rule of thumb is the volume level you hear
from the PC speakers or headphones will be the volume level that is recorded by IAC,
however, you should use the audio level bar graphs in the IAC section of the
ScanControl Control / Monitor screen to verify the proper level.
- Configuring IAC Program Options – Start
ScanControl with your radio connected via the serial cable as you would
normally and the audio cable as described above. Open the Program Options
screen and set the Audio Device, Audio Device Line, Wave Format and
Group by
options as appropriate for your configuration. You should not have
to adjust the THold setting, 100 is the recommended value. Save these
settings and close the Program Options screen.

- Enabling / Disabling Recording for Channels / TGIDs
– ScanControl supports the construct of having an individual Record Out
attribute for each channel / TGID in a bank or system and for a particular
search range. IF THESE RECORD OUT ATTRIBUTES ARE NOT ENABLED IN THE
RADIO AND IN SCANCONTROL (R box checked on the Bank, ScanList, System or
Group Edit Screens) THEN SCANCONTROL WILL NOT RECORD THE AUDIO, EVEN IF THE
AUDIO CAN BE HEARD COMING THROUGH THE PC. Referencing the table of
radio types above, some radios support a Record Out attribute in the radio,
others do not. Those that do require that you check the R box for the
channel / TGID and then program the data into the radio. Those that handle
the Record Out attribute in S/W only require that you check the R box for
the channel / TGID but there’s no need to then program the data into the
radio. DMA Base / Mobile radios also have a System Level Record Control
with 3 possible settings: OFF – Means no audio will be sent out the Record
Out connector for that system regardless of how the Record Out attributes on
each channel / TGID is set, MK – Marked means only the channels / TGIDs in
that system with the Record Out attributes set will have their audio sent to
the Record Out connector, ALL – All channels / TGIDs will have their audio
sent to the Record Out connector for that system regardless of how the
Record Out attributes on each channel / TGID is set. The user also needs to
be cognizant of this setting to be sure it is set for the desired option.
- Starting a Recording Session – Once you have
done all of the configuration steps above and you are hearing the radio’s
audio through the PC speakers you are ready to start a recording session.
From within ScanControl open the Control / Monitor screen. Click the Start
button within the IAC Section of the Control / Monitor screen (see the
Control / Monitor screen shot for your particular radio). The displays within the IAC Section will become un-grayed and as
a scan or search hit is logged in the Scan / Search Hit window and audio is
received from the radio you should see the Recording Time number counting up
and the audio level bar graphs bouncing up and down indicating the recording
level.
- Completing a Recording Session – The IAC
recording session will continue until you click the IAC Stop button or until
you Close the Control / Monitoring screen in ScanControl. If you click the
IAC Stop button its label will change to “Res” for resume, allowing you to
resume the current session if you wish.
- Playback of the Recorded Files – IAC recorded
files are not played back through ScanControl. The files can be played back
using any available PC media software such a iTunes or Windows Media
Player. The files will be located on the PC’s hard drive in accordance with
the folder structure established with the Group by IAC option set on
the ScanControl Program Options screen. The screen shots on the
IAC Overview Page show how the IAC recording
files are organized for each of the 3 Group by options. Using Windows
Explorer the user can locate any of the IAC recording files and double click
on them to invoke the default audio player and playback the recording.
See our IAC Troubleshooting page if you
are having difficulties getting IAC to work.
|
